Having just returned from holiday yesterday afternoon and having re-read BKCII I thought it was high time I got a game in to re-familiarise myself with the rules. I also had a few ideas that I wanted to try out on the table.
Scenario:
To keep things simple I went with the encounter scenario from the rulebook set in the summer of 1944. The battlefield features a central road running in a valley between both armies, both sides of the table feature various numbers of small hills some of which are wooded.
House Rules:
I thought seeing as I have large amounts of 6mm completed for the 1 to 1 scale games I used to do I'd try out BKCII at this figure scale (lets call it squad scale as opposed to the usual platoon scale). To do this I used/came up with/amended the following rules:
1. Use the Commanders optional rule but amending note 2 for this rule so that commanders aren't forced to move first and removing note 3 completely as I felt that a commander could move and command his troops without penalty (however this penalty could be applied if a CO/HQ moved out of a command post).
2. Companies with more than 1 HQ stand (for example a tank company with a HQ tank and a deputy HQ tank) could use that reserve HQ to take over command of the company if the main HQ was lost.
3. Replacement of lost HQ's - I decided not to allow this seeing as I was using the commanders rule. If a formation lost its HQ I would still allow it to activate at a -1 (perhaps representing a junior officer attempting to take command) or be taken over by a higher HQ.
4. For better trained formations I'd allow a platoon HQ stand to give more tactical flexibility.
5. For formations that fail to activate at all I'd allow a higher HQ to try and activate them (with appropriate penalties depending on doctrine and distance).
6. Although not used in the game described below I thought that off table artillery ought to be represented as a single model per battery hence they'd keep the same stats as per the rules. I may well also use the reduced artillery fire zones optional rule.
7. Hits stay on. I did also think of using ARV's to remove a hit by activating beside a damaged vehicle, this gives a reason to use all those painted ARV's I have.
The Forces:
For last nights game I selected the following:
Russians -
1x T-34/85 CO(CV8) (battalion commander)
2 Tank Companies, each with: 1x T-34/85 HQ(CV7) (company commander) and 3 platoons each with 3x T-34/85.
Germans
1x Pzkpfw IVH CO(CV9) (Company HQ) and 1x Pzkpfw IVH HQ(CV8) (deputy company HQ)
2 Panzer Platoons, each with 1x Pzkpfw IVH HQ(CV8) (platoon HQ) and 4x Pzkpfw IVH's
1 Panzer Platoon with 1x Panther G HQ(CV8) (platoon HQ) and 4x Panther G
The reason for the mixed company was simply because I couldn't find the box with the rest of the Pzkpfw IV's in!
The Game:
Turn 1:
The Germans activate first and the Panther platoon moves out in wedge formation on the German right closely followed by one of the Pzkpfw IVH platoons with the Company HQ tanks taking up the rear. The other Pzkpfw IVH platoon takes up hull down positions on two hills on the (defensive) left flank.
The Russian tank companies are both deployed in platoon columns in a reverse V formation. One company is deployed on the right and the other on the left with the Battalion HQ in the centre between them. The right hand company moves off first and deploys its platoons in to line whilst still maintaining the V formation. The right hand platoon is then hit by opportunity fire from the hull down Pzkpfw IV's which although causing ten hits in total fails to destroy a single tank, though all 3 tanks are damaged and surpressed.
The left hand T-34/85 company fails its activation roll so the battalion HQ has to intervene to get them moving and deployed in to line (they were also in a V formation). This company halts just before it climbs the hill separating (and shielding) it from the advancing German right wing.
Turn 2:
The hull down Pzkpfw IV's activate and destroy 2 of the T-34's they fired at last turn, fortunately for the T-34's they fail to activate again. The Panthers are next to activate moving down the hill on the German right flank and in to the valley. On their next activation they open fire on the right hand T-34 companies leading left platoon suppressing 2 of the T-34's. The remaining T-34 from that platoon Op fires the Panthers damaging but not suppressing one of the tanks (which managed to save 4 out of the 5 hits). The right hand Pzkpfw IV platoon fails its activation roll whilst the Company HQ moves up to a hull down position on the hill.
Both of the Russian companies fail to activate so the Battalion HQ has to get involved again and manages to push the left hand company forward and gets one of its platoons in to a hull down position on the hill. The right hand Pzkpfw IV platoon and the Company HQ both Op fire this platoon knocking 2 tanks out and damaging a third. This set back must of been the reason for the Battalion HQ to fail to activate again hence ending the turn.
Turn 3:
Both Pzkpfw IV's platoons fail to activate this turn but the Panthers make up for that by rolling a double 1 and proceed to shoot up the remains of the right hand T-34 companies leading two platoons, one Panther is suppressed by Op fire and then is forced to fall back as the T-34 Company HQ opens fire on it. The Panthers activate again and destroy the T-34 HQ and force the leading tank of the third platoon to fall back damaged. The Pzkpfw IV Company HQ activates and engages the final remaining damaged hull down T-34 from the platoon that was decimated last turn. The 2 HQ tanks score a total of 5 hits but only one is saved and the T-34 is destroyed which means the Russian Battalion has now reached its breakpoint.
The T-34 Battalion HQ succeeds in passing the break test and the Left Hand T-34 company moves another of its intact platoons forward to engage the Panthers. Although they manage to damage and suppress a couple of Panthers the Op fire from the Pzkpfw IV's is deadly causing another pair of T-34's to burn. At this point I ended the game as the left hand T-34 company had failed to reactivate and the right hand company wouldn't move at all (having lost 70% of their number who can blame them?).
Observations:
Overall everything worked well and the game flowed well even though I was a bit rusty. Points to note for the next time:
1. The Russians definitely needed at least 1 more battalion as a 2nd wave. That said things may well of been different with the forces I did use had the Germans not had the Panthers with their 4+ saving throw and slightly better gun.
2. I must check if hull down vehicles count as hull down when the observer is at the same height as they.
3. I really must remember to reset the camera as the pictures I did take didn't come out well at all - unfortunately I'd left the detail setting on hence the reason there are no photos with this post!
I'm having another go today with different forces.
- Posted using BlogPress
Showing posts with label Russian WW2. Show all posts
Showing posts with label Russian WW2. Show all posts
Sunday, 17 November 2013


Saturday, 14 September 2013
Russian Regiments
Another batch of units that are being reboxed.
1223rd Self Propelled Gun Regiment
This Regiment formed one of the Self Propelled Gun Regiments attached to the 29th Tank Corps in 1944. This unit was one of two equipped with lend lease M10 tank destroyers, unfortunately there is only a single picture and no details on their combat performance (see http://www.o5m6.de/m10_wolverine.html). Each Regiment has 4 "companies" (equal to a single German platoon) each of which is represented by a single M10 (US19) stand. A fifth M10 is used as the HQ. The Regiment also has a tank riding SMG company (SR3).

14th Guards Separate Heavy Tank Regiment
This Regiment was occasionally attached to the 29th Tank Corps (from the 5th Guards Tank Army reserve) so forms one of the optional Army level attachments available for the BKC version of the 29th Tank Corps. As with the 1223rd Regiment above this Regiment also has 4 "companies" each of which is represented by a single IS-2 (S16) stand. A fifth IS-2 is used as the HQ. The Regiment also has a tank riding SMG company (SR3).

20th Guards Super Heavy Howitzer Artillery Brigade
Another small but powerful Russian unit, consisting of 4 Super Heavy Artillery Battalions. As each Battalion had three batteries of two 203mm howitzers I decided to represent each Battalion with a single 203mm Howitzer (S33). For on table use I may well add a set of S65 tractors (S46) and probably a HQ.


- Posted using BlogPress
1223rd Self Propelled Gun Regiment
This Regiment formed one of the Self Propelled Gun Regiments attached to the 29th Tank Corps in 1944. This unit was one of two equipped with lend lease M10 tank destroyers, unfortunately there is only a single picture and no details on their combat performance (see http://www.o5m6.de/m10_wolverine.html). Each Regiment has 4 "companies" (equal to a single German platoon) each of which is represented by a single M10 (US19) stand. A fifth M10 is used as the HQ. The Regiment also has a tank riding SMG company (SR3).
14th Guards Separate Heavy Tank Regiment
This Regiment was occasionally attached to the 29th Tank Corps (from the 5th Guards Tank Army reserve) so forms one of the optional Army level attachments available for the BKC version of the 29th Tank Corps. As with the 1223rd Regiment above this Regiment also has 4 "companies" each of which is represented by a single IS-2 (S16) stand. A fifth IS-2 is used as the HQ. The Regiment also has a tank riding SMG company (SR3).
20th Guards Super Heavy Howitzer Artillery Brigade
Another small but powerful Russian unit, consisting of 4 Super Heavy Artillery Battalions. As each Battalion had three batteries of two 203mm howitzers I decided to represent each Battalion with a single 203mm Howitzer (S33). For on table use I may well add a set of S65 tractors (S46) and probably a HQ.
- Posted using BlogPress
Monday, 18 March 2013
An Update
Sorry it's been a while since I posted, works been pretty busy of late and thats taken up much of my energy. I thought it was about time I posted an update:
Painting:
I have gradually fought my way through the two 1944/45 era Russian tank brigades and they are now both complete (pics to follow later), though at some point I want to add the bits needed to make them usable for 1943 - I have everything I just need to paint it.
I have also painted up a IS-2 Regiment, which at 1:3 scale has 9 of the beasts (2 per company and 1 HQ tank) and I'm just in the process of painting up the SMG company to give the regiment some infantry support. This unit represents the 14th Guards Separate Heavy Tank Regiment which was attached to the 29th Tank Corps in June '44. This regiment was part of the 5th Guards Tank Army as an army asset rather than being a permanent part of the 29th Tank Corps. I will also be painting up the earlier KV-1S equipped version of this regiment for 1943/early '44 games.
Also on the painting table are the two company command units needed to complete the two Panzer Grenadier Companies I did earlier in the year.
Old Models:
Recently I discovered how effective Dettol is in stripping the paint off old models. So far I've managed to recover 69 models and have plenty more to go at. It does take a bit of effort and Dettols pretty pungent stuff but it's definitely worth the effort as you do end up with effectively new models (which are also germ free!).
Projects:
Having recently sold off some of my old 15mm I used the proceeds to finish off a few of my armies so I'm now looking to paint up the following formations (how long they'll actually take me is another matter entirely!):
Various Russian and German WWII units including various assault gun, heavy tank and artillery units. The 29th Tank Corps will get its SU-76's, SU-85's, SU-122's, SU-152's, ISU-152's and Lend-Lease M-10's. A Panther Battalion will be added to the existing 1944 Panzer Regiment. There's lots more on top of all that.
October War 1973 - I have put together the models needed for an Egyptian Tank and Infantry Brigade (more on these units as they get built). I have also put together a few Israeli Battalions to give the Egyptians something to fight - these battalions will be made up of M48's, M60's and Centurions and there will also be some infantry though the actual type of infantry unit is yet to be decided (probably mechanised but Para's are also an option). I also have some brigade (Israeli) and divisional (Egyptian) level support.
Cold War 1989 - I have created a BMP (BMP-1/2 & T-72) equipped Motor Rifle Regiment and a Tank Regiment (T-72's, no BMP battalion) from one of the Motor Rifle Divisions stationed in Czechoslovakia. I also have the models to do the Divisional Anti-Tank Battalion, the Divisional Recce Battalion, a 2S3 Battalion and various other divisional assets. To face them I have elements from the US 3rd Infantry Division (Mechanised) which will include an M1 Abrams equipped tank battalion and a M2 Bradley equipped mechanised battalion, again there will be plenty of brigade/divisional level support.
Thats all for now.
Cheers
Richard
- Posted using BlogPress
Painting:
I have gradually fought my way through the two 1944/45 era Russian tank brigades and they are now both complete (pics to follow later), though at some point I want to add the bits needed to make them usable for 1943 - I have everything I just need to paint it.
I have also painted up a IS-2 Regiment, which at 1:3 scale has 9 of the beasts (2 per company and 1 HQ tank) and I'm just in the process of painting up the SMG company to give the regiment some infantry support. This unit represents the 14th Guards Separate Heavy Tank Regiment which was attached to the 29th Tank Corps in June '44. This regiment was part of the 5th Guards Tank Army as an army asset rather than being a permanent part of the 29th Tank Corps. I will also be painting up the earlier KV-1S equipped version of this regiment for 1943/early '44 games.
Also on the painting table are the two company command units needed to complete the two Panzer Grenadier Companies I did earlier in the year.
Old Models:
Recently I discovered how effective Dettol is in stripping the paint off old models. So far I've managed to recover 69 models and have plenty more to go at. It does take a bit of effort and Dettols pretty pungent stuff but it's definitely worth the effort as you do end up with effectively new models (which are also germ free!).
Projects:
Having recently sold off some of my old 15mm I used the proceeds to finish off a few of my armies so I'm now looking to paint up the following formations (how long they'll actually take me is another matter entirely!):
Various Russian and German WWII units including various assault gun, heavy tank and artillery units. The 29th Tank Corps will get its SU-76's, SU-85's, SU-122's, SU-152's, ISU-152's and Lend-Lease M-10's. A Panther Battalion will be added to the existing 1944 Panzer Regiment. There's lots more on top of all that.
October War 1973 - I have put together the models needed for an Egyptian Tank and Infantry Brigade (more on these units as they get built). I have also put together a few Israeli Battalions to give the Egyptians something to fight - these battalions will be made up of M48's, M60's and Centurions and there will also be some infantry though the actual type of infantry unit is yet to be decided (probably mechanised but Para's are also an option). I also have some brigade (Israeli) and divisional (Egyptian) level support.
Cold War 1989 - I have created a BMP (BMP-1/2 & T-72) equipped Motor Rifle Regiment and a Tank Regiment (T-72's, no BMP battalion) from one of the Motor Rifle Divisions stationed in Czechoslovakia. I also have the models to do the Divisional Anti-Tank Battalion, the Divisional Recce Battalion, a 2S3 Battalion and various other divisional assets. To face them I have elements from the US 3rd Infantry Division (Mechanised) which will include an M1 Abrams equipped tank battalion and a M2 Bradley equipped mechanised battalion, again there will be plenty of brigade/divisional level support.
Thats all for now.
Cheers
Richard
- Posted using BlogPress
Friday, 25 January 2013
BKCII - The Build Up Part 2
Over the last few nights I have found time to base up a few new models from Heroics and Ros:

On the front row we have some T-34/85's (S09) (the first of a batch of 23 to finish one tank brigade and add a new one). On the second row are some Panther G's (G017) which will form part of the first of 4 companies of Panthers from I./Panzer Regiment Grossdeutschland which was attached to Panzer Regiment 11. Finally on the back row we have the Sdkfz 251/9 (G041) and Sdkfz 251/2 (G021C) to complete the 2 companies from I./Panzer Grenadier Regiment 114 and a single Sdkfz 251/7 (G151) as transport for the engineers from II./Panzer Regiment 11. All are now undercoated.
Next up are the completed Panzer Grenadiers that form most of the first two companies for I./Panzer Grenadier Regiment 114:

These have been repainted to bring them up to the same standard as my new models and the bases re-flocked. Each of the two companies consists of 5 Sdkfz 251/1D, 4 bases of Panzer Grenadiers (1 on the left with a Panzershreck) and 1 base of tripod mounted MG-34/42. On the top right of the photo you can see the engineers for II./Panzer Regiment 11. I took a few more close ups:


- Posted using BlogPress
On the front row we have some T-34/85's (S09) (the first of a batch of 23 to finish one tank brigade and add a new one). On the second row are some Panther G's (G017) which will form part of the first of 4 companies of Panthers from I./Panzer Regiment Grossdeutschland which was attached to Panzer Regiment 11. Finally on the back row we have the Sdkfz 251/9 (G041) and Sdkfz 251/2 (G021C) to complete the 2 companies from I./Panzer Grenadier Regiment 114 and a single Sdkfz 251/7 (G151) as transport for the engineers from II./Panzer Regiment 11. All are now undercoated.
Next up are the completed Panzer Grenadiers that form most of the first two companies for I./Panzer Grenadier Regiment 114:
These have been repainted to bring them up to the same standard as my new models and the bases re-flocked. Each of the two companies consists of 5 Sdkfz 251/1D, 4 bases of Panzer Grenadiers (1 on the left with a Panzershreck) and 1 base of tripod mounted MG-34/42. On the top right of the photo you can see the engineers for II./Panzer Regiment 11. I took a few more close ups:
- Posted using BlogPress
Wednesday, 17 October 2012
1/2 a BKCII Game
I managed to get in half of an 8 turn BKCII early Russian Front game this evening, unfortunately I lost about an hour setting the table up but I had to sort stuff out to make space for my small 4' x 3' table (which incidentally must be getting on a bit now as my Dad built it for me some 20+ years ago).
The game itself went well although it was probably a little on the slow side simply because I kept looking things up (it is only my 2nd game after all and playing solo doesn't help either but wargamers are few and far between in Lancashire). The Russians deployed a full tank regiment from the 2nd Tank Division, 3rd Mechanised Corps; the Germans deployed Panzer Regiment 1, 1st Panzer Division. The first two turns consisted of a burst of movement followed by an almost complete failure on my part to roll well and activate anything. On top of all that the Russian CO blundered on his 1st activation and promptly left the table!
During turns 3 and 4 both sides continued to advance and commenced firing at each other. Another blunder saw a BT-7 destroyed by the blunder outcome (it ended up taking 12 hits!). The Germans managed to take out a KV-2 but it was hard work as the KV tanks have a 4+ save and the Germans suffered losses in return. I halted the game at this point as I'd run out of time.
I jotted down a few things to learn from this game, these are:
1. It may well be better to have a HQ per company (it would only be able to command it's own company though) for the Germans just to give them the opportunity to out manoeuvre the Russians. This would obviously need to be balanced out by the number of Russian units fielded. A rough ratio of 1 German battalion to 1 Russian regiment might be right if the Germans have a lot of HQ's though at the end of the day things are rarely fair and balanced in war.
2. The Germans should be fielded with a mix of troops to get the combined arms effects that they were so skilled at - hitting the advancing Russians with artillery and airstrikes would of been very helpful to the Germans.
3. I really need to base my CO's/HQ's on either different sized or different shaped bases, there were times when I accidentally moved a HQ because I couldn't easily tell them apart from the normal stands.
The game itself went well although it was probably a little on the slow side simply because I kept looking things up (it is only my 2nd game after all and playing solo doesn't help either but wargamers are few and far between in Lancashire). The Russians deployed a full tank regiment from the 2nd Tank Division, 3rd Mechanised Corps; the Germans deployed Panzer Regiment 1, 1st Panzer Division. The first two turns consisted of a burst of movement followed by an almost complete failure on my part to roll well and activate anything. On top of all that the Russian CO blundered on his 1st activation and promptly left the table!
During turns 3 and 4 both sides continued to advance and commenced firing at each other. Another blunder saw a BT-7 destroyed by the blunder outcome (it ended up taking 12 hits!). The Germans managed to take out a KV-2 but it was hard work as the KV tanks have a 4+ save and the Germans suffered losses in return. I halted the game at this point as I'd run out of time.
I jotted down a few things to learn from this game, these are:
1. It may well be better to have a HQ per company (it would only be able to command it's own company though) for the Germans just to give them the opportunity to out manoeuvre the Russians. This would obviously need to be balanced out by the number of Russian units fielded. A rough ratio of 1 German battalion to 1 Russian regiment might be right if the Germans have a lot of HQ's though at the end of the day things are rarely fair and balanced in war.
2. The Germans should be fielded with a mix of troops to get the combined arms effects that they were so skilled at - hitting the advancing Russians with artillery and airstrikes would of been very helpful to the Germans.
3. I really need to base my CO's/HQ's on either different sized or different shaped bases, there were times when I accidentally moved a HQ because I couldn't easily tell them apart from the normal stands.
Sunday, 14 October 2012
Romanian Cavalry MkIII - Decisions
I've made the decision to go with 1:4 rather than 1 stand = 1 platoon as I felt that was a better way to do organise things. So that now means the TO&E I posted last time is slightly different as each cavalry squadron now has 2 infantry stands rather than 3. I also decided to drop the battalion HQ's as because of the small size of the squadron the regiment really ought to be the manoeuvre unit, this now gives the Brigade 3 main manoeuvre units each of which can be strengthened by attaching out the brigade level support squadrons.
I have also completed BKCII lists for most of the rest of the units that made up the Romanian 3rd Army which has made for quite an interesting research project, I just have the Infantry Division list to do and that's everything for the 3rd Army. Unfortunately the Cavalry Corps had no Corps level support units so is rather a week formation really (and in reality is really only a division in size).
As for actual models I have completed 2 cavalry regiments (which admittedly were already painted) but would have to spend some hard earned cash with Heroics and Ros to enable me to complete the rest of the brigade. I suspect that if I do complete the brigade I would add 2 more cavalry regiments - 1 motorised, 1 as horsed cavalry - to enable me to field a semi-motorised or a horsed cavalry brigade. The only difference in the brigade support squadrons appears to be the number of "tanks" in the Mechanised Recon Squadron (4 real tanks for the horsed cavalry and 6 for the semi-motorised cavalry which I would do as 1 and 2 models respectively just to make the differences in the two units more apparent on the table top), other than that there are no other differences.
I have another solo BKCII game involving a June 1941 clash between the Russian 3rd Tank Regiment (2nd Tank Division, 12th Mechanised Corps) and Panzer Regiment 1 (1st Panzer Division) scheduled in for Wednesday evening. This is a semi-historical encounter as the Panzer Regiment was in reality the 11th equipped with Pzkpfw 35(t)'s rather than the 1st equipped with Pzkpfw IIIG's but it was in the same area at that time. How well the Germans will deal with the 4 KV-1's and 2 KV-2's the Russians will field I don't know, but they will definitely fare better than a unit equipped with Pzkpfw 35(t)'s! The 1st Panzer was one of the few units with 50mm armed Pzkpfw III's so is somewhat better off than the 37mm armed Pzkpfw 35(t)'s fielded by Panzer Regiment 11. Report to follow later in the week.
I have also completed BKCII lists for most of the rest of the units that made up the Romanian 3rd Army which has made for quite an interesting research project, I just have the Infantry Division list to do and that's everything for the 3rd Army. Unfortunately the Cavalry Corps had no Corps level support units so is rather a week formation really (and in reality is really only a division in size).
As for actual models I have completed 2 cavalry regiments (which admittedly were already painted) but would have to spend some hard earned cash with Heroics and Ros to enable me to complete the rest of the brigade. I suspect that if I do complete the brigade I would add 2 more cavalry regiments - 1 motorised, 1 as horsed cavalry - to enable me to field a semi-motorised or a horsed cavalry brigade. The only difference in the brigade support squadrons appears to be the number of "tanks" in the Mechanised Recon Squadron (4 real tanks for the horsed cavalry and 6 for the semi-motorised cavalry which I would do as 1 and 2 models respectively just to make the differences in the two units more apparent on the table top), other than that there are no other differences.
I have another solo BKCII game involving a June 1941 clash between the Russian 3rd Tank Regiment (2nd Tank Division, 12th Mechanised Corps) and Panzer Regiment 1 (1st Panzer Division) scheduled in for Wednesday evening. This is a semi-historical encounter as the Panzer Regiment was in reality the 11th equipped with Pzkpfw 35(t)'s rather than the 1st equipped with Pzkpfw IIIG's but it was in the same area at that time. How well the Germans will deal with the 4 KV-1's and 2 KV-2's the Russians will field I don't know, but they will definitely fare better than a unit equipped with Pzkpfw 35(t)'s! The 1st Panzer was one of the few units with 50mm armed Pzkpfw III's so is somewhat better off than the 37mm armed Pzkpfw 35(t)'s fielded by Panzer Regiment 11. Report to follow later in the week.
Wednesday, 26 September 2012
Blitzkrieg Commander II
I decided to try a solo test game of Blitzkrieg Commander II (BKCII) the other night as the local wargames club in Chorley uses this for its WWII games and I thought it would be a good idea to see how it works before going along.
I went for a 6mm game set in 1941 using a Russian motorised regiment from a Tank or Mechanised Division vs a Schutzen (Panzer Grenadier) Battalion. Both units were represented at 1 stand = 1 platoon/battery. True to form I managed to blunder on the very first Russian activation roll! Strangely the Russians activated far more than I'd of expected with a Command Value (or CV) of 7, it may have been something to do with the +1 CV for all doing the same thing rule given to armies classed as having Rigid Doctrine?
Rather stupidly I deployed the Schutzen Battalion over too wide a frontage and had trouble activating all of it in one go. Then on top of that it failed to activate when I was planning to dismount the infantry from their trucks and then proceeded to lose two platoons to Russian fire when their trucks blew up!
Unfortunately I didn't get time to finish the test game but thankfully I did get far enough in to the game to get the leading two Russian Battalions in to firing range of the Schutzen companies so I did get a couple of turns using the shooting rules. Both sides ended up losing quite a few platoons of infantry once I realised that it was far better to concentrate your fire on one target than hit multiple targets and then have the hits taken off at the end of the turn.
Overall the game played well and was easy to remember though taking the hits off is a little strange (there is an optional rules to leave them on at the end of the turn). I felt that there had been quite a bit of thought behind the mechanisms so that although they are easy to use (and remember) you still appeared to get a similar result to more complex rules sets. Also I felt that BKCII (and Cold War Commander) is very well supported via the online forums.
Having tried out the rules it got me thinking that this style of system might be adaptable to the Zulu War and possibly to the Ironclad era (1860-1885) - both are periods I have miniatures for but haven't yet found rules I'm happy with. I found with the Ironclads that most sets of rules are far too focused on the detail and can't be used for fleet actions without causing me headaches or RSI from throwing hundreds of dice to represent each and every gun firing!
Monday, 3 September 2012
WW2 Wargame
This past weekend we played an early war Eastern Front
clash between elements of the German 1st Panzer Division and the 5th
Tank Regiment of the Russian 3rd Tank Division of the 1st
Mechanised Corps. I based the scenario on an actual clash between the 6th
Panzer and the same Russia Division, details of which can be found here http://rkka.ru/drig/identif/Ostrov/ostrov_01.htm along
with plenty of pictures of the knocked out Russian tanks (you will need to translate the page).
We used Marks Microrules set, he controlled the Germans and I tried to lead my newly painted Russians. Apart from the planes (not shown) all models are from my own collection. All models are Heroics and Ros.
We used Marks Microrules set, he controlled the Germans and I tried to lead my newly painted Russians. Apart from the planes (not shown) all models are from my own collection. All models are Heroics and Ros.
 |
| The German Advance in Centre - having suffered multiple double 6 blunders they have multiple breakdowns! |
 |
| German defensively deployed right flank complete with infantry Guns, 37mm PAK 35/36 and a platoon of Panzer IIIG (short 50mm) |
 |
| BT-7 tanks advancing on my left flank, the leading platoon has just lost the 2nd tank in from the left and it's neighbour has just had it's tracks shot off! Unfortunately these tanks were trying to advance against a battery of infantry guns one of which mounted a 150mm howitzer (SIG 33/Pz I). |
 |
| The Russian advance in the centre, my infantry have just begun to occupy the village with my flame tanks (converted double turreted T-26A's) moving round in support, though some of them are already in flames! |
 |
| The Russian gun line and right flank (more BT-7's). These 152mm howitzers did a good job of protecting my centre from the German left hook. |
 |
| Another view of the centre and of the bridge which was the primary objective for both sides. |
 |
| The German right flank again, this time showing the results of an ammunition reload blunder (double 6 on 2D6 when attempting to activate)!! |
 |
| The aftermath! Loads of burning, knocked out or abandoned vehicles plus a few of the German and Russian survivors (including the remnants of my T-28/KV-1/2 heavy battalion). Rather surprisingly I actually won this game simply because the Germans didn't complete the destruction of the various Russian units. |
 |
| A second view of the centre |
 |
| A third view - in the distance you can see the two German 10.5cm howitzers that kept hitting my tanks with HE throughout the game |
Friday, 15 June 2012
Russian Early War Tanks
Here's my latest batch of early war tanks, still need to do the flock/stones on the bases so I'll post some more pictures of them once they're done.
Firstly we have 9 T-35 5 turreted monsters, these have been rebased, repainted and varnished. Originally they were on 30mm square bases but that proved to be too small a base to properly appreciate one of my favourite tanks so I have re-based them on 30mm x 40mm bases. These models will be joined by 10 more of these monsters along with some KV-1 tanks to form the heavy tank battalion of the 67th Tank Regiment of the 34th Tank Division in July 1941. The models to the front are (left to right) the Battalion HQ and the 3 tanks Staff HQ Platoon, the models to the back form 1 company of 1 HQ tank and 2 two tank platoons:

Secondly we have 3 KV-2 tanks which will be added to the T-28 tank battalion of my 5th Tank Regiment, 3rd Tank Division, 1st Mechanised Corps (also from July 1941):

Finally we have 4 T-26B's which are also assigned to the 5th Tank Regiment's flame tank battalion. These tanks will be joined at some point by 6 flamethrower versions (Kht-26) to make a full company. One of these tanks will be the Company HQ tank, the others will form a 3 tank platoon:

All models are from Heriocs and Ros. The organisational charts that these formations are for are available from the Wargames Vault (lists R211 and R288).
Firstly we have 9 T-35 5 turreted monsters, these have been rebased, repainted and varnished. Originally they were on 30mm square bases but that proved to be too small a base to properly appreciate one of my favourite tanks so I have re-based them on 30mm x 40mm bases. These models will be joined by 10 more of these monsters along with some KV-1 tanks to form the heavy tank battalion of the 67th Tank Regiment of the 34th Tank Division in July 1941. The models to the front are (left to right) the Battalion HQ and the 3 tanks Staff HQ Platoon, the models to the back form 1 company of 1 HQ tank and 2 two tank platoons:
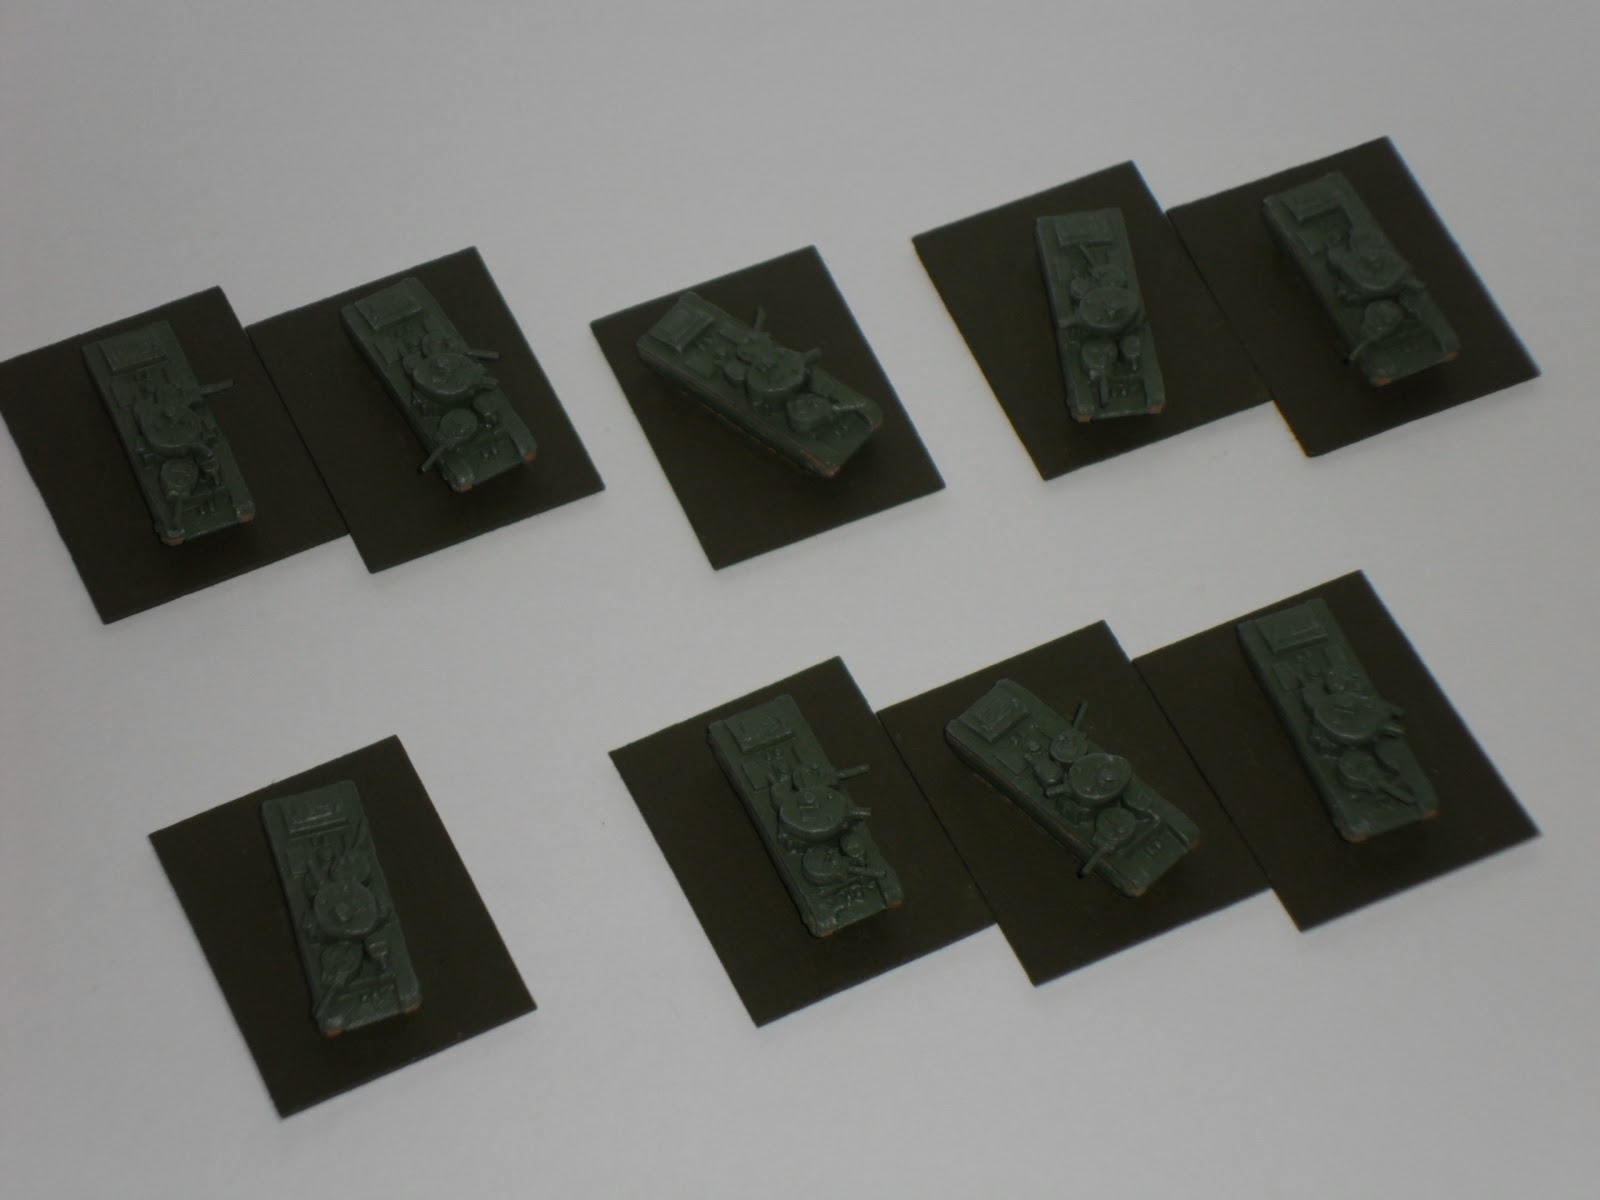
Secondly we have 3 KV-2 tanks which will be added to the T-28 tank battalion of my 5th Tank Regiment, 3rd Tank Division, 1st Mechanised Corps (also from July 1941):

Finally we have 4 T-26B's which are also assigned to the 5th Tank Regiment's flame tank battalion. These tanks will be joined at some point by 6 flamethrower versions (Kht-26) to make a full company. One of these tanks will be the Company HQ tank, the others will form a 3 tank platoon:

All models are from Heriocs and Ros. The organisational charts that these formations are for are available from the Wargames Vault (lists R211 and R288).
Subscribe to:
Posts (Atom)